A freshly painted front door and shutters instantly transforms your home's appearance. This project delivers impressive results without requiring professional skills or expensive materials. It specifically enhances curb appeal and protects these exterior elements from weather damage. Additionally, it allows you to express your personal style through color choices while saving hundreds compared to replacement costs.
This guide breaks down the entire process—from selecting the perfect paint to applying the final coat. We'll cover proper preparation techniques, painting methods for both doors and shutters, and finishing touches that ensure professional-looking results. By following these steps, you'll complete your transformation in just one weekend.
Planning Your Project
Proper planning sets the foundation for a successful front door and shutter painting project. Taking time to prepare beforehand prevents frustrating delays and ensures beautiful, long-lasting results. Let's break down the essential planning elements to make your project run smoothly.
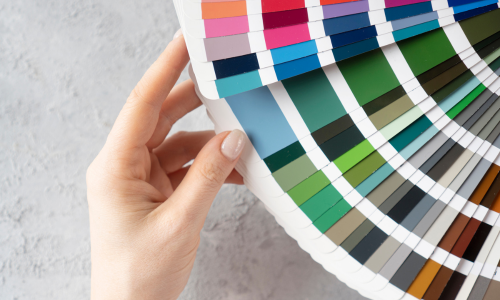
Decide on your color scheme
The right color combination can dramatically enhance your home's architectural features and create striking curb appeal. Before purchasing paint, consider:
- The existing colors of your home's exterior
- Your neighborhood's esthetic (some HOAs have color restrictions)
- The architectural style of your house
- How sunlight affects color appearance throughout the day
Rather than rushing into a decision, sample and test paint colors on your front door and shutters. Factors such as natural lighting, undertones, and your property's fixed elements significantly impact how a color appears on your exterior .
If you're uncertain about matching your shutters to your door, remember that complementary colors often create the most appealing visual impact. Furthermore, some homeowners choose to remove worn-down shutters altogether, embracing the increasingly popular shutterless trend.
Check the weather forecast
Temperature plays a crucial role in how well paint adheres and cures. The ideal temperature range for exterior painting is between 50°F and 70°F, though acceptable conditions can range from 35°F to 100°F. Painting outside this range can lead to improper drying, cracking, and peeling.
Humidity also affects paint application. It is recommended to paint on surfaces with temperatures at least 5°F above the dew point to prevent condensation issues. High humidity causes paint to dry improperly, potentially leading to mildew and bacteria growth. Therefore, aim for humidity levels between 40% and 70% for optimal results.
Seasonal timing matters too. Early summer and fall typically offer the most favorable conditions with minimal rainfall, lower humidity, and less dramatic temperature fluctuations between day and night. If you live in a region with distinct seasons, fall provides an excellent painting window—spring is often too damp, summer too hot, and winter too cold.
Most importantly, avoid painting when rain is expected within 4-8 hours, as moisture prevents proper adhesion. When possible, schedule your project for early morning or late afternoon to avoid direct sunlight.
Estimate time and effort needed
A front door and shutter painting project typically requires a full weekend, with most of the time spent on preparation and drying rather than actual painting. Professional estimates suggest about 2.5 hours for prepping and painting a single door, including priming, filling holes, caulking, sanding, and applying two coats of paint.
To manage your project effectively, note these time considerations:
First, remember that each coat of paint needs adequate drying time. If you don't have a storm door, your entrance will be temporarily covered with plastic while the paint dries—meaning weather conditions become even more important.
Second, plan for multiple coats. Most projects require at least two coats of color and possibly a primer coat. Many homeowners prepare materials the night before and start early in the morning to ensure the door is dry enough to close by nightfall.
Lastly, factor in potential delays due to weather changes or unexpected surface preparation needs. Building in this buffer time prevents rushing through important steps that could compromise your final results.
Gathering the Right Tools and Materials
Success in painting your front door with shutters hinges on gathering quality tools and materials before you begin. The right supplies not only make the job easier but ensure a professional-looking, long-lasting finish that withstands the elements.
Paint and primer selection
Selecting appropriate paint for your entryway project is crucial for durability and appearance. Most professionals recommend using exterior-grade paint specifically formulated to withstand weather exposure. For most front doors and shutters, acrylic latex exterior paint offers excellent flexibility, fills imperfections, and resists cracking and chipping.
Semi-gloss or satin finishes are particularly popular for front doors because they're durable and easy to clean. These finishes subsequently hide imperfections better than flat paints while providing a slightly reflective surface that enhances architectural details.
For wooden doors that contain tannins (like cedar or cypress), consider an oil-based exterior paint as it's less susceptible to tannin bleed-through. Steel doors benefit from direct-to-metal paints that include rust inhibitors and eliminate the need for separate primers.
Primer selection depends on your door's material. Choose:
- Multi-surface stain-blocking primer for natural and composite wood
- Bonding primer for smooth, nonporous surfaces like fiberglass
- High-performance acrylic metal primer for metal doors
Brushes, rollers, or sprayers
The right application tools ensure smooth, even coverage. Professional painters typically recommend using both brushes and rollers for door painting.
For brushes, invest in a 2-inch angled brush for detailed areas and a 1½-2 inch flat brush for broader surfaces. Quality matters—cheap brushes often leave bristles behind and create uneven coverage.
Mini rollers with low nap or foam covers work perfectly for flat door panels and shutters. A 4-inch roller with 1/4-inch nap delivers excellent results on smooth surfaces. Essentially, rollers cover larger areas quickly while brushes handle detailed sections that rollers can't reach.
Although more expensive initially, paint sprayers offer advantages for shutter painting. They reach nooks and crannies effectively and create an ultra-smooth finish. Nonetheless, sprayers use approximately 33% more paint than brushes and rollers , requiring more extensive masking and setup time.
Protective gear and masking supplies
Safety equipment protects both you and your home during the painting process. Indeed, proper protection prevents unnecessary cleanup and potential health hazards.
Essential protective gear includes:
- Dust mask or respirator for sanding and painting fumes
- Safety glasses or goggles to protect eyes from splatters
- Gloves (disposable nitrile for latex paint, solvent-resistant for oil-based)
- Drop cloths or tarps for floor protection
Effective masking requires several key supplies. Painter's tape secures protective materials and creates clean edges . Plastic sheeting works well for covering nearby plants or furniture, while canvas drop cloths provide sturdy floor protection against spills and foot traffic.
For doors with hardware, either remove knobs and hinges or use specialized products like magnetic hinge shields to prevent paint transfer. Moreover, consider using masking paper for windows and trim areas that need precise protection.
Gathering these materials before starting ensures your project proceeds smoothly without interruptions for emergency supply runs. Quality tools might cost more initially, but they provide better results and often last through multiple projects, making them a worthwhile investment.
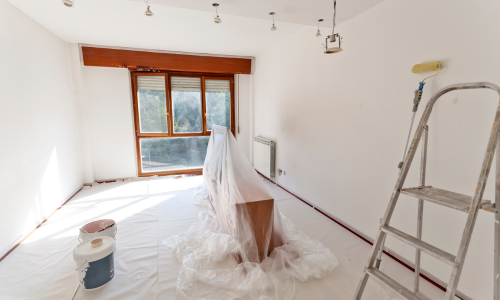
Prepping Your Front Door and Shutters
Proper preparation makes the difference between a professional-looking paint job and one that peels within months. Tackling the prep work for your front door with shutters requires patience and attention to detail, yet this crucial phase ensures your fresh paint adheres properly and lasts for years.
Remove or mask hardware
Deciding whether to remove or mask your door hardware depends on your specific situation. Whenever possible, remove all hardware from your door, including doorknobs, knockers, locks, and any decorative elements. This approach creates a flat, even surface for painting and prevents accidental paint splatters on your fixtures.
Store removed hardware pieces in labeled bags or containers to prevent losing small parts. Take photos of the hardware arrangement prior to removal to make reinstallation easier. For electronic keypads or complex lock mechanisms that cannot be easily removed, carefully apply painter's tape around the edges.
If your shutters are installed with metal mounting clips, they can typically be lifted off easily for painting. Conversely, shutters installed with plastic mounting nails might be better painted in place. In this case, use painter's tape to protect the surrounding siding and windows from accidental paint transfer.
Clean and sand surfaces
Throughout their lifespan, front doors and shutters collect dirt, oils, and grime that prevent paint from adhering properly. First, thoroughly wash all surfaces with a degreasing cleaner or mild soap and water solution. For vinyl shutters, a soft-bristle brush helps remove stubborn dirt without damaging the surface.
Once clean, allow the surfaces to dry completely. Afterward, sand the door and shutters to create a slightly rough texture that helps the new paint bond. For doors with existing paint:
- Start with 120-grit sandpaper to remove imperfections
- Progress to 220-grit for a smoother finish
- Finally, use 320-grit paper if the surface still feels rough
Sanding is equally important for vinyl shutters, as their smooth surface otherwise provides poor adhesion for paint. Once sanding is complete, wipe all surfaces with a clean, damp cloth to remove dust particles. A tack cloth works exceptionally well for capturing fine dust that might otherwise end up in your paint.
Apply primer if needed
Primer serves as the foundation for your paint job, primarily when changing colors or working with bare materials. Apply primer if:
- You're making a significant color change
- Your door shows signs of tannin bleeding (common in cedar and cypress doors)
- The surface has weathering, deterioration, or pitting
- You're painting bare wood or metal
- You're painting vinyl shutters (as latex paint doesn't bond well to bare plastic)
For doors, apply primer using a 1½-2" angled brush for recessed areas and detailed sections first, then use a mini roller for flat surfaces. When priming vinyl shutters, be careful not to use metal-etching primers intended for cars or appliances, as these can damage plastic surfaces.
Allow the primer to dry according to the manufacturer's recommendations—usually 1-4 hours—before proceeding with your color coats.
Painting Techniques for a Smooth Finish
Achieving a professional finish comes down to mastering the right painting techniques for your front door and shutters. Once you've completed the prep work, the actual painting process requires patience and careful attention to detail.
Painting the front door step-by-step
The key to a flawless front door finish lies in the proper painting sequence. First, use an angled brush for recessed areas and detailed sections, then switch to a mini roller for flat surfaces. Follow this painting order for optimal results:
- Edges first - Start with the door edges, particularly the hinged side
- Panels - Paint any recessed panels using a brush for corners and a roller for flat areas
- Horizontal rails - Move to the horizontal cross sections
- Center vertical strips - Paint the vertical sections in the middle
- Outer vertical stiles - Finish with the vertical strips on the sides
Apply paint in thin, even coats rather than one thick layer. This approach prevents drips and creates a smoother finish that dries more evenly. Work from top to bottom in manageable sections to maintain a wet edge throughout the process.
Best practices for painting shutters
Wood shutters require different techniques than vinyl ones. For wooden shutters, always paint with the grain of the wood. Begin with center panel details and work outward if dealing with slatted shutters, paint the slats first while being careful not to let paint build up in corners.
Vinyl shutters need special preparation since latex paint doesn't bond well to bare plastic. Apply a plastic-specific primer before painting to ensure proper adhesion. Despite being more labor-intensive, spray painting creates the most uniform finish on shutters, especially for reaching into slats and crevices.
Drying times and second coats
Proper drying time between coats is crucial for a lasting finish. Latex paint typically dries to the touch in about one hour and can be recoated in four hours. In contrast, most oil-based paint takes 6-8 hours to dry to the touch and requires a full 24 hours before applying a second coat.
Several factors affect drying time. Ideal painting temperatures range between 50-85°F for latex paint and 40-90°F for oil-based paint. High humidity significantly extends drying time, so aim for humidity levels below 50%.
Importantly, a paint's drying time differs from its curing time. While paint may feel dry to the touch, it isn't fully cured until much later—approximately 7 days for oil-based paints and up to 30 days for latex paints. Until fully cured, handle the painted surfaces with care to avoid damaging the finish.
Reinstalling and Final Touches
The culmination of your painting project comes with reinstalling hardware and adding final touches that make your project complete. After allowing adequate drying time, you're ready for the finishing stages that transform your project from work-in-progress to picture-perfect.
Reattaching hardware and shutters
Wait until your paint has fully dried before reinstalling any components. For most latex paints, this means waiting at least 24 hours, although complete curing takes significantly longer. Upon reinstallation, handle newly painted surfaces with care to avoid damaging the finish.
If you removed your shutters using metal mounting clips, simply hook them back onto the clips and slide them into place. For shutters installed with plastic mounting nails, you'll need to drill new holes and insert shutter lok fasteners through the holes, then tap them with a hammer for a secure fit.
When reattaching door hardware, first remove painter's tape from protected areas. Carefully replace door handles, locksets, and decorative elements using the photos you took during disassembly as a reference. Furthermore, consider updating your hinges to match new hardware for a cohesive look.
Inspecting for missed spots
As a result of completing the reinstallation, closely examine your front door with shutters for any areas requiring touch-ups. Natural light helps identify missed spots, drips, or thin areas. For small touch-ups:
- Use the same paint you applied to the door
- Cover surrounding hardware with painter's tape
- Lay a drop cloth under the work area
- Feather paint into surrounding areas for a seamless finish
Conclusion
A freshly painted front door and shutters transforms your home's exterior appearance dramatically. Throughout this guide, we've walked through each step needed to complete this satisfying weekend project. Proper planning forms the foundation of success - from choosing complementary colors to checking weather forecasts and estimating your time commitment realistically.
Quality materials and tools certainly make a significant difference in your results. The right paint, primer, brushes, and protective gear ensure both your safety and a professional-looking finish. Additionally, thorough preparation work prevents future issues, as clean, properly sanded surfaces create the perfect foundation for paint adhesion.
Patience proves essential during the actual painting process. Applying thin, even coats and following the proper sequence creates that smooth, flawless finish neighbors will admire. Adequate drying time between coats prevents frustrating issues like bubbling or peeling that might otherwise undo your hard work.
Last but certainly not least, careful reinstallation of hardware and final touch-ups complete your transformation. This relatively simple DIY project delivers impressive results without requiring specialized skills or expensive professionals. This upgrade will not only enhance curb appeal but also protect these exterior elements from weather damage for years to come.