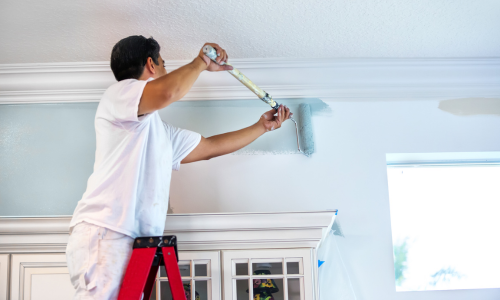
Sealing basement walls properly can prevent thousands of dollars in water damage and protect your home's structural integrity. Water intrusion affects nearly 60% of basements in the United States, yet many homeowners overlook this critical maintenance task until serious problems develop.
Furthermore, basement moisture issues rarely resolve themselves—they typically worsen over time, leading to mold growth, deteriorating foundations, and decreased property value. By understanding the right techniques and materials for waterproofing your basement, you can effectively create a dry, usable space while safeguarding your investment. This comprehensive guide will walk you through everything you need to know about identifying moisture problems, preparing your surfaces, selecting appropriate products, and implementing proper sealing techniques for long-lasting results.
Understanding Why Basement Walls Need Sealing
The porous nature of concrete means your basement walls are surprisingly vulnerable to moisture infiltration. Up to 98% of basements will experience some form of water damage, making it an essential protection measure for your entire home.
Common sources of basement moisture
Basement moisture typically comes from three primary sources. First, external water from rainfall, snowmelt, or groundwater can penetrate foundation walls. During heavy precipitation, water saturates the soil surrounding your foundation, creating hydrostatic pressure that forces moisture through even tiny openings.
Second, internal sources contribute significantly to basement dampness. These include everyday activities like cooking, showering, and doing laundry that release water vapor into the air. Unvented clothes dryers and humidifiers are particularly problematic moisture contributors. Additionally, new concrete can release up to 0.2 gallons of moisture per square foot of wall as it cures.
Third, condensation occurs when warm, humid air contacts cooler basement surfaces. This is especially common during summer months when warm outdoor air enters your basement and meets cool foundation walls. The resulting condensation creates a damp environment perfect for mold growth.
How water affects your foundation over time
The consequences of leaving basement walls unsealed can be severe and costly. When water accumulates around your foundation, it creates hydrostatic pressure that pushes against your foundation walls. This pressure can cause concrete to crack, creating entry points for even more moisture.
Moreover, persistent moisture leads to a destructive cycle. As water repeatedly infiltrates and evaporates, it weakens concrete through a freeze-thaw process, accelerating deterioration. In wood components, prolonged moisture exposure causes rotting, potentially compromising your home's structural integrity.
Another serious consequence is mold and mildew growth. These fungi thrive in damp environments, particularly affecting organic materials like wood. Beyond structural damage, mold poses health risks, especially for those with respiratory conditions.
Notably, water damage doesn't happen overnight—it's a gradual process that becomes increasingly expensive to repair the longer it's ignored.
Signs your basement walls need sealing
Recognizing moisture problems early can save you significant time and money. Watch for these telltale indicators:
- White powdery substance (efflorescence) on walls, indicating mineral deposits left behind as water evaporates
- Musty odors persisting in your basement, a strong indicator of mold or mildew
- Visible cracks in foundation walls, especially horizontal ones, which suggest water pressure
- Damp spots or water stains on walls or floors, particularly after rainfall
- Peeling paint or wallpaper, signaling moisture behind wall coverings
Additionally, watch for condensation on pipes, windows, or walls, as well as doors and windows that suddenly become difficult to open or close, which could indicate a shifting foundation due to water damage.
By recognizing these warning signs early and understanding the sources and effects of basement moisture, you can take appropriate action to protect your home through proper sealing techniques.
Preparing Your Basement for Sealing
Proper preparation is essential before applying any sealant to your basement walls. Skipping this critical step can lead to sealant failure, wasted money, and ongoing moisture problems. Let's examine the key preparation steps that ensure your sealing project succeeds.
Inspecting for cracks, gaps, and moisture
Begin with a methodical inspection of your entire basement. Look closely at all walls, paying special attention to corners, joints between walls and floors, and areas around pipes or utility penetrations. Your inspection should focus on three critical elements:
Types of cracks: Identify all cracks and note their orientation. Horizontal cracks, especially mid-wall, often indicate soil pressure and can be structurally concerning. Vertical cracks typically result from normal settling, whereas stair-step cracks in mortar lines suggest uneven foundation settling. Measure and photograph any cracks to monitor changes over time.
Moisture indicators: Check for water stains, discoloration, or dampness on walls and floors. These signs reveal potential entry points requiring attention before sealing. Also look for peeling paint or wallpaper, as these commonly indicate moisture behind wall coverings.
Structural concerns: Examine wall surfaces for bowing or bulging, which may signal serious pressure issues requiring professional assessment before sealing.
Cleaning surfaces and removing efflorescence
Once you've completed your inspection, the next step involves thorough cleaning:
Basic surface preparation: Remove all loose material from the walls using a wire brush or scraper. Clear away dirt, old paint, wallpaper residue, and any debris that could prevent proper sealant adhesion. Remember to wear protective gear during this process.
Efflorescence removal: That white, powdery substance on your walls is efflorescence – mineral deposits left behind when water evaporates from concrete. Beyond being unsightly, efflorescence indicates water has penetrated your walls. Remove it by scrubbing with a wire brush, then treating the area with a masonry cleaner or a solution of one part muriatic acid to four parts water. Always wear protective equipment when working with these chemicals.
Complete drying: Allow walls to dry thoroughly after cleaning – this may take several days. Rushing this step by applying sealant to damp walls almost guarantees failure. Patience here prevents wasted effort later.
Testing for external vs. internal water sources
Before selecting appropriate sealing products, determine whether water is entering from outside or forming as condensation inside:
Plastic wrap test: Tape a one-foot square of aluminum foil or plastic wrap tightly against the wall. Check it after 24 hours. If the side facing the wall is wet, water is penetrating from outside. If the room-facing side is wet, you're dealing with condensation from interior humidity.
Timing pattern assessment: Monitor when moisture appears. Does it correlate with rainfall? This suggests external penetration. Does it happen when humidity rises inside your home? This points to condensation issues.
Hose test: For suspected entry points, have someone inside watching while you systematically spray water against exterior walls, starting low and working upward. This can help pinpoint exactly where water enters.
Remember that different water sources require different solutions. External seepage may need crack repairs and waterproofing sealants, while condensation might require improved ventilation or dehumidification alongside sealing.
Only after thoroughly inspecting, cleaning, and identifying your moisture source should you proceed to selecting the appropriate sealing products for your specific situation.
Choosing the Right Sealing Products
Selecting the appropriate sealing products for your basement walls can make the difference between a successful waterproofing project and ongoing moisture problems. With numerous options available on the market, understanding the strengths and limitations of each type will help you make an informed decision that addresses your specific basement conditions.
Acrylic vs. epoxy vs. silicate sealers
Each type of basement sealer offers distinct benefits and drawbacks that make them suitable for different scenarios:
Acrylic sealers provide an affordable and user-friendly option for DIY enthusiasts. These sealers form a thin protective layer on concrete surfaces and are available in both solvent and water-based formulations. Solvent-based acrylics generally enhance color better and provide superior protection against water infiltration compared to water-based products. However, they typically contain higher levels of Volatile Organic Compounds (VOCs), requiring careful handling. The lifespan of acrylic sealers ranges from one to three years, making them less durable than other options.
Epoxy sealers create a high-build protective film that offers excellent durability and abrasion resistance. These two-component products provide outstanding water repellence and are ideal for high-traffic areas such as finished basements or workshops. Epoxy coatings typically last 5-7 years, although premium systems with polyurethane top coats can extend life expectancy up to 10 years. One significant limitation is that epoxies may yellow with UV exposure, making them generally better suited for interior applications.
Silicate sealers (also called penetrating sealers) work differently by soaking into the concrete and creating a chemical reaction that strengthens the material. Unlike surface sealers, these products don't alter the appearance of your basement walls and provide invisible protection with a matte finish. They excel at waterproofing because they block water without changing the surface appearance. Penetrating sealers offer excellent protection against outdoor exposure conditions and most are breathable, allowing moisture vapor to escape.
When to use hydraulic cement
Hydraulic cement serves a specific purpose in basement waterproofing – stopping active water leaks. Unlike conventional cement, hydraulic cement sets and hardens quickly even in wet conditions, making it invaluable for emergency situations. This specialized material expands as it cures, creating a watertight seal in cracks and gaps in foundation walls.
The fast-setting properties of hydraulic cement make it ideal for:
- Sealing cracks in concrete walls or floors
- Patching holes in pipes
- Stopping active water leaks
- Repairing worn mortar joints in masonry walls
However, hydraulic cement should be viewed as a targeted solution rather than a comprehensive waterproofing approach. Its rapid setting time (typically 3-5 minutes) means you must work quickly, mixing only small amounts that can be used within 2-3 minutes. Additionally, hydraulic cement primarily addresses symptoms rather than underlying causes of water intrusion. For structural cracks or wide gaps, professional assessment may be necessary before applying hydraulic cement.
Factors to consider: surface type, moisture level, budget
Surface type significantly influences your sealer selection. For porous concrete surfaces, penetrating sealers like silicate products work effectively by strengthening the concrete from within. Conversely, dense or previously sealed surfaces may benefit from topical sealers like epoxy or acrylic products that create a protective layer.
Moisture levels in your basement dictate which products will perform best. For basements with high humidity or active water intrusion, penetrating concrete sealers that block moisture while allowing vapor transmission offer optimal protection. Epoxy coatings provide excellent water resistance for moderate moisture conditions, whereas acrylic sealers may suffice for primarily dry basements with minimal moisture concerns.
Budget considerations often impact product selection. Acrylic sealers represent the most economical option, typically costing $1-$6 per square foot, but require more frequent reapplication. Epoxy and silicate sealers command higher prices ($5-$7 per square foot) but generally offer superior longevity and performance. For exterior applications, sodium bentonite can be more affordable than other coatings at approximately $2 per square foot.
Remember that intended use affects your choice as well. For high-traffic areas or spaces used frequently, invest in durable options like epoxy or polyurethane coatings that withstand wear and abrasion. For storage areas or occasional use spaces, less expensive acrylic sealers might provide adequate protection.
Step-by-Step Process to Seal Basement Walls
The actual process of sealing basement walls begins once you've completed all necessary preparations and selected appropriate materials. Successfully implementing this crucial project requires following precise steps in the correct sequence.
Repairing cracks and holes
Initially, identify and clean all damaged areas thoroughly. For cracks or holes, remove loose debris using a wire brush and vacuum away dust. Next, create a "V" notch in cracks using a hammer and chisel—this provides better adhesion for repair materials. Afterward, rinse the area to ensure proper bonding.
For hairline cracks smaller than 1/4 inch, silicone caulk works effectively. Meanwhile, larger openings require more substantial solutions. Remember that proper surface preparation ultimately determines your repair's longevity.
Using hydraulic cement for active leaks
Hydraulic cement provides immediate solutions for active water leaks. This specialized material expands as it cures, creating watertight seals even in wet conditions. Mix three parts hydraulic cement powder with one part cold water until forming a pliable paste. Importantly, mix only small batches that can be used within 3-5 minutes since it sets rapidly.
Once prepared, press the cement firmly into cracks, ensuring it's packed densely throughout the opening. For actively leaking areas, hold the cement in place until it begins to set. Remarkably, certain hydraulic cements can even be applied underwater.
Applying waterproofing paint or sealant
Once repairs have cured completely, apply waterproof coating to the entire wall surface. Quality masonry waterproofers typically cover 75-100 square feet per gallon and require minimum two coats. Stir the product thoroughly without thinning, subsequently applying with a 3/4-inch nap roller or quality nylon brush.
Start application from the top of walls, working downward in 3-foot sections. Upon completion, inspect carefully for pinholes or missed spots that might compromise waterproofing integrity.
Tips for even application and drying time
Allow 2-3 hours between coats under optimal conditions. Furthermore, maintain temperatures above 50°F throughout application and drying periods. Back-brushing helps work the waterproofer deeply into concrete pores, ensuring maximum protection.
Following application, inspect walls for any missed areas or pinholes. Upon discovering these weak points, apply additional product specifically to those areas. Complete curing typically requires 7-14 days before walls can be exposed to moisture.
When to DIY and When to Call a Pro
Deciding who should handle your basement wall sealing project depends largely on the complexity of your moisture issues and your DIY skills. Making the right choice will save you time, money, and potential headaches.
Projects suitable for homeowners
Minor basement issues are often manageable for homeowners with basic skills. You can successfully tackle condensation problems by installing dehumidifiers to control indoor humidity. Furthermore, applying waterproof paints or sealants to basement walls is generally straightforward if you can paint a wall. Simple crack repairs using hydraulic cement and surface preparation also fall within most homeowners' capabilities.
Warning signs that require professional help
Certain situations demand expert intervention. Call professionals immediately if you notice:
- Horizontal cracks in foundation walls (indicating soil pressure)
- Recurring leaks despite DIY attempts
- Standing water or persistent dampness after rainfall
- Visible mold growth or persistent musty odors
- Structural issues like bowing or bulging walls
Attempting to fix these serious problems yourself may worsen the situation or mask symptoms without addressing underlying causes.
Conclusion
Properly sealing your basement walls stands as one of the most important maintenance tasks you can undertake as a homeowner. Water intrusion affects nearly 60% of basements across the United States, yet many people wait until serious damage occurs before addressing the issue. This approach ultimately costs more money and creates bigger headaches down the road.
Taking time to inspect your basement regularly for warning signs like efflorescence, musty odors, or visible cracks allows you to catch problems early. Additionally, understanding whether moisture comes from external sources or internal condensation helps determine which sealing solution will work best for your specific situation.
Choosing the right products makes all the difference in creating lasting protection. Acrylic sealers offer budget-friendly options with shorter lifespans, while epoxy products provide superior durability at higher costs. Silicate sealers penetrate concrete to strengthen it from within, making them excellent for certain applications. Hydraulic cement, though not a comprehensive solution, works wonderfully for stopping active leaks quickly.
The preparation phase certainly deserves as much attention as the application itself. Clean surfaces, properly repaired cracks, and completely dry walls create the foundation for successful sealing. Rushing through these steps almost guarantees disappointing results.
Some basement issues fall well within DIY territory, particularly minor cracks or surface sealing projects. However, structural problems like bowing walls, horizontal cracks, or persistent water issues despite previous attempts signal the need for professional intervention. These warning signs should never be ignored, as they often indicate more serious underlying problems that require expert assessment and specialized solutions.
Sealing your basement walls represents a smart investment that protects your home's structural integrity, prevents expensive water damage, and creates healthier living conditions for your family. Though the process requires careful planning and proper execution, the long-term benefits of a dry, properly sealed basement far outweigh the initial investment of time and money.